Powered Cache Cloudflare Extension is designed to enhance your website’s performance and security when using Cloudflare as a CDN (Content Delivery Network). This extension offers key features such as restoring the real IP address of your users, purging the Cloudflare cache directly from your website, and securely handling your Cloudflare API credentials.

Setting Up API Credentials
To interact with Cloudflare’s API for features such as cache purging, you need to define your API key and token within your website’s configuration. Follow the steps below to securely set up your Cloudflare API credentials:
Obtain API Token from Cloudflare:
- Log in to your Cloudflare account.
- Navigate to the ‘My Profile’ section.
- Find your API keys and create a token with the necessary permissions.
Simply visit https://dash.cloudflare.com/profile/api-tokens to access your token.
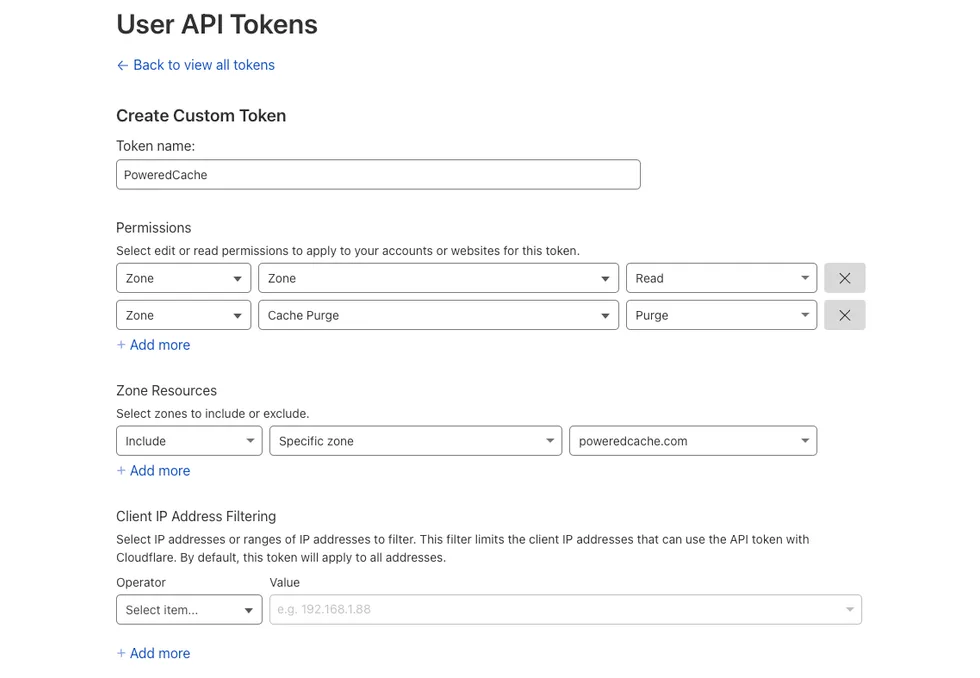
You can use “WordPress” as template when creating a new token, but if you prefer to create a custom token, you can adjust permissions like it shown here:

Powered Cache also supports the usage of Global API Keys; however, this is considered legacy, and we will eventually remove this feature. Therefore, it is advisable to use API Tokens wherever possible, particularly for security reasons.
Enter Your Details
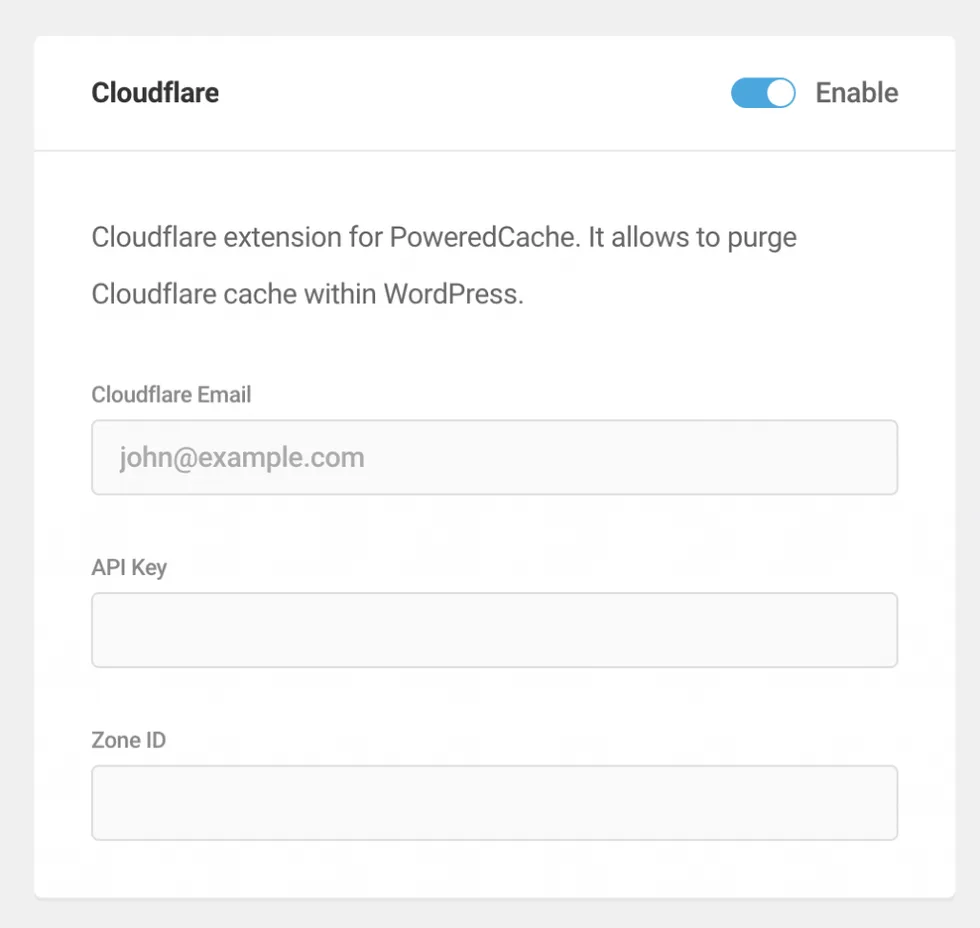
Once you have enabled Powered Cache’s Cloudflare extension, you will need to enter either your API Token and Zone or your email address and API Key. Once you have entered one of these options, save your changes.
Define API Credentials in wp-config.php:
Cloudflare API credentials must be treated as sensitive information, so we encrypt them when saving them in your database. Alternatively, you can define your API Key or API Token in your configuration file.
To do this, access your website’s wp-config.php file, usually located at the root of your WordPress installation.
Safely insert the following lines of code, replacing ‘YOUR-API-KEY’ and ‘YOUR-API-TOKEN’ with your actual Cloudflare API key and token respectively:
define( 'POWERED_CACHE_CF_API_KEY', 'YOUR-API-KEY' );
define( 'POWERED_CACHE_CF_API_TOKEN', 'YOUR-API-TOKEN' );
Verify Cloudflare Cache Purge Works:
When you purge the cache, you normally see a success message if the request is sent successfully:

You can also verify with Cloudflare response headers if cache purge works.

The CF-Cache-Status header displays “EXPIRED” after the cache is cleared. If it’s a busy website, Cloudflare might already cache the content again, so you can check the “Age” header to understand when it was purged.

Please remember, when you export Powered Cache settings, this information will not be included in the export file. You will need to configure this information for each website individually or use definitions in your configuration file.